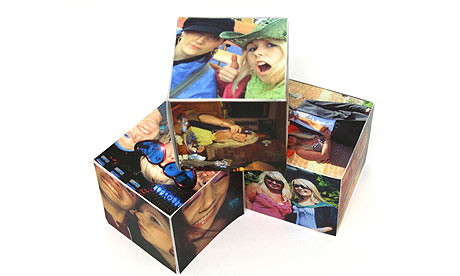
Photo Cubes
Writing about web page http://www.guardian.co.uk/lifeandstyle/2009/mar/16/homemade-mothers-day-presents-photo-cube
Making your own presents doesn’t have to be difficult or time-consuming. You don’t need a massive collection of glue and paper and fabric and embellishments to rustle up a gift or two, and you don’t even need to learn any new skills. Sometimes, all is takes is a bit of cutting and sticking.
A photo cube is really, really easy to make. It’s just card + scissors + photos + glue, ‘equipment’ that can usually be found in the house somewhere or, failing that, in the office (not that I’m advocating office stationery theft, of course). If you’ve not bought anything for Mother’s Day yet, then it’s an ideal little something to give to your mum on Sunday.
Like any handmade present, it can be personalised and it shows you’ve done more than dropped into Tesco on your way to visit. What’s more, it might bring back floods of happy memories of all the wonderfully rubbish stuff you made for her from egg cartons, washing-up liquid bottles and crepe paper as a nipper.
If you’re not going to see your mum on Sunday, don’t worry. Make a small photo cube and send it, unfolded, with instructions on how to assemble it.
Photo cube
What you need
A piece of thin card
Pencil
Ruler
Craft knife or scissors
Six photos
Spray mount or a glue stick
Double-sided tape
Sticky back plastic (optional)
What to do
1. Draw a cube net on to a piece of thin card, or download one of these ready-made ones (pdf) and print it out.
2. Cut the cube net out: a craft knife and ruler will give you the cleanest cut, but you can use scissors if you don’t have one to hand. Score each line carefully.
3. Choose six pictures for your photo cube. As each photo needs to be the same size as the face of your cube net, you need to either a) use photo editing software to make each picture the same size, then print them out, or b) print the photos out first, then cut them to size.
4. Glue one photo to each face of the cube net, on the side without the black lines. I thoroughly recommend that you use spray mount for this rather than a glue stick – you will get a better, more even coverage with no little lumps, so your pictures will have a smooth finish. A can costs about £7, but it lasts for ages and can be used for all sorts of paper craft. Of course, if you don’t have any spray mount, use a glue stick or double-sided tape.
5. This step is entirely optional, but if you want make your photo cube a little more study, cover the whole cube net in sticky back plastic.
6. Add strips of double-sided tape to the tabs and assemble the cube. Again, I prefer not to use a glue stick – double-sided tape is far less messy – but use whatever suitable adhesive you have to hand.
• More of Perri’s crafty musings at makeanddowithperri.wordpress.com

 Jiao Liu

 Loading…
Add a comment
You are not allowed to comment on this entry as it has restricted commenting permissions.